- JiBX is fast!
- JiBX has a small footprint (it will add only 60KB to your .apk)
- JiBX uses the Android XMLPull parser by default
- It's easy to use!
We all appreciate the advantages of being able to use java classes to do data manipulation.
person.setFirstName("Don"); is much easier then messy DOM manipulation: document.getElementsByTagName("first").item(0).appendChild(document.createTextNode("Don"));Let's create a sample project.
First, create java bindings for your XML schema using JiBX, or select a pre-build schema library.
For this example, we'll use a pre-built binding from the JiBX schema library. Our sample xsd file is an XML definition which includes a person's first and last name.
Click here to see our sample schema in the JiBX library. You may want to take a look at the schema and the JiBX generated java source code.
Download the java jar file by right-clicking this
link and select 'save as'.
Next, download the jibx runtime jar file by right-clicking this link and select 'save as'. We'll need these jars shortly.
Now we're ready to create our Android application. First you need to install eclipse and the Android SDK.
From Eclipse, select New -> Project -> Android Project.
I'm calling this project 'jibxapp'.

On the next screen, select your target api.

Finally, enter your java package name.
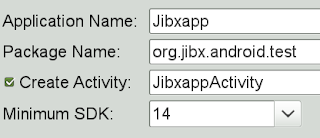
You project should appear in your workspace.
Navigate to jibxapp -> res -> layout and double-click main.xml to bring up the form editor.
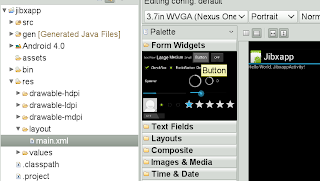
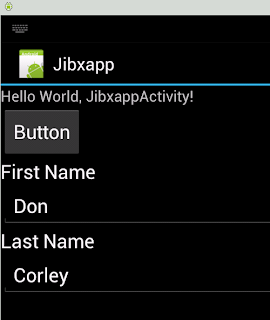
Add a button, two medium static text fields, two data text boxes, and a multi-line text box so your screen looks something like this:
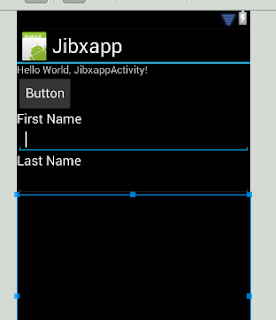
You may want to test your Android emulator here by right clicking the project name and selecting 'Debug as' -> 'Android Application'.
To add your java binding and the JiBX runtime, right-click your project name and select properties. Click 'java build path' -> Libraries -> 'Add external jars' and add the two jars that we downloaded earlier.

Navigate and open your Android source code file.

Add this test code to your java source file:
package org.jibx.android.test;

import java.io.ByteArrayOutputStream;
import java.io.StringReader;
import java.io.UnsupportedEncodingException;

import org.jibx.runtime.BindingDirectory;
import org.jibx.runtime.IBindingFactory;
import org.jibx.runtime.IMarshallingContext;
import org.jibx.runtime.IUnmarshallingContext;
import org.jibx.runtime.JiBXException;
import org.jibx.schema.org.jibx.sampleschema.person.Person;

import android.app.Activity;
import android.os.Bundle;
import android.view.View;
import android.widget.Button;
import android.widget.EditText;

public class JibxappActivity extends Activity {
/** Called when the activity is first created. */
@Override
public void onCreate(Bundle savedInstanceState) {
 super.onCreate(savedInstanceState);
 setContentView(R.layout.main);

 mPickDate = (Button) findViewById(R.id.button1);
 mFirstName = (EditText) findViewById(R.id.editText1);
 mLastName = (EditText) findViewById(R.id.editText2);
 mTextBox = (EditText) findViewById(R.id.editText3);
 // add a click listener to the button
 mPickDate.setOnClickListener(new View.OnClickListener() {
  @Override
  public void onClick(android.view.View v) {
   doJibxTest();
  }
 });
}

Button mPickDate = null;
EditText mFirstName = null;
EditText mLastName = null;
EditText mTextBox = null;

/**
 * Add the test table records.
 */
public void doJibxTest() {
  Person person = new Person();
 person.setFirstName(mFirstName.getText().toString());
 person.setLastName(mLastName.getText().toString());

 String xml = marshalMessage(person);
 mTextBox.setText(xml);

 Person personOut = (Person) unmarshalMessage(xml);

 mPickDate.setText(personOut.getFirstName() + ' ' + personOut.getLastName());
}

/**
 * Marshal this message to xml .
 *
 * @param message
 * @param system
 * @return
 */
public final static String STRING_ENCODING = "UTF8";
public final static String URL_ENCODING = "UTF-8";
String bindingName = "binding";

public String marshalMessage(Object message) {
 try {
  IBindingFactory jc = BindingDirectory.getFactory(bindingName, Person.class);
  IMarshallingContext marshaller = jc.createMarshallingContext();
  ByteArrayOutputStream out = new ByteArrayOutputStream();
  marshaller.marshalDocument(message, URL_ENCODING, null, out);
  return out.toString(STRING_ENCODING);
 } catch (UnsupportedEncodingException e) {
  e.printStackTrace();
 } catch (JiBXException e) {
  e.printStackTrace();
 }
 return null;
}

/**
 * Unmarshal this xml Message to an object.
 * @param xml
 * @param system
 * @return
 */
public Object unmarshalMessage(String xml) {
 try {
  IBindingFactory jc = BindingDirectory.getFactory(bindingName, Person.class);
  IUnmarshallingContext unmarshaller = jc.createUnmarshallingContext();
  return unmarshaller.unmarshalDocument(new StringReader(xml), bindingName);
 } catch (JiBXException e) {
  e.printStackTrace();
 }
 return null;
}
}
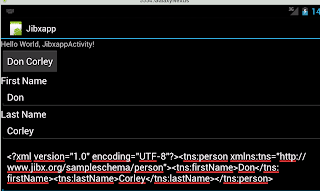
This program takes the First and Last Name entered, plugs them into a java data object, marshals the object to xml, and unmarshals the xml back to a data object and extracts the data from it. I made this program very simple, of course you would not do this kind of processing in the main thread.
Run your application by right clicking the project name and selecting 'Debug as' -> 'Android Application'. Enter your first and last name and click the button on the top.
Voilà!
